Tuesday, November 2, 2010

Creating a Caravaggio - The Painting Stage

The first step in the painting stage is called dead colouring. In this stage, each element of the painting receives a coat of opaque paint. One colour for the part in light and one colour for the part in shadow. This is the overall average colour of an area that sets up the big relationships between all the parts. It is this big relationship that carries the painting and guides the addition of later details. Notice for example, in the image below, how the flesh colour of the head and hands is both darker and redder than the flesh of the torso.
The medium used here is one part linseed oil to three parts damar varnish.


Next, in the first painting stage, we focus on creating the illusion of form with colour. This is the stage in which all the variations are placed into the simplified earlier stage. The look should be one of a mosaic of colour with little or no blending. The medium used is one part linseed oil to two parts damar varnish.


Finally, in the second painting stage, the colours are replaced and attention is payed to the subtlety of blending. The goal is to recreate in paint all the various textures. The medium is one part linseed oil to one part damar varnish.


Once the painting has dried take a look at the overall effect. Some parts may need repainting. Often a simple glaze or tone of color will achieve the desired look- either darkening some part or softening an edge here and there.

Make sure you wait six months to a year to apply the final varnish.

Saturday, August 14, 2010

Creating a Caravaggio -The Drawing Stage


As a follow-up to the post " The Perfect Painting Method," I thought I would share with you that method put to work in a copy of Caravaggio's St. Jerome.

The first step is the drawing (above) which in this case was done by making a grid copy of a print of the original. The drawing should be a simple two-value silhouette, focusing on the light and shadow pattern of the image. This simple image is the starting point to organize the complex visual information of reality.

Next, transfer this drawing onto a canvas that has been toned to a mid value (here, Old Holland burnt umber mixed with a little lead white was used). Once this campitura has dried (the longer the better), you can transfer the drawing. This is done by tracing the image onto tracing paper, rubbing charcoal on the back of the tracing, placing it on top of the canvas and going over the lines of the drawing so the image transfers to the canvas. Often, there are traces of charcoal dust that end up staying on the canvas. This is easily removed by blowing or brushing it away.


Finally, reinforce the lines and flll in the darks using raw umber thinned with turps.


In the next post I will describe the stages of painting.

Saturday, August 7, 2010

Forgotten Master - Henrique Medina 1901 – 1988


Henrique Medina was born in the small Portuguese fishing village of Esposende, part of the same town that my father came from. I learned about him through family friends, who had a copy of his catalogue raisonne. I later found and visited the studio he built in Esposende where he spent the last years of his life.


Medina began his studies at age 13 at the Oporto School of Fine Arts, an institution that continued to teach the lessons of its 19th century academic origins. Having completed his studies by the age of 18, Medina moved on to Paris, studying under Carmon and Bernard. By 1929 he had painted the portraits of the Portuguese president Almirante Canto, Cardinal Manual Cerejeira and a number of society portraits in Lisbon and Porto. Later he worked in London and in Italy, where he painted Mussolini’s portrait in 1931. Medina spent World War II in the Americas: first Brazil, then Argentina and finally the US. He has left to the museums and collections of these countries a number of works. While in the US he befriended Charlie Chaplin, Walt Disney and Mary Pickford among others. It was at this time he painted the portraits of Dorian Grey for the film of the same name and one of Greer Garson for the film “Mrs. Parkington”. Returning to Portugal in 1946, he continued his portrait career for dignitaries throughout Europe including a portrait of Pope John Paul II in 1982. With his personal work Medina was a painter of individuals, particularly characters from the Minho and Douro the country north of Oporto.


If you ever get a chance to visit northern Portugal, be sure to visit the Medina Museum next to the city hall in the city of Braga and his studio in the town of Esposende. You can also find his work in the Palacio da Bolsa in Oporto and in the Museu do Chiado in Lisbon. Click here for a YouTube video of his paintings of women.

Monday, July 26, 2010

The Perfect Painting Method


The terminology I use in describing the painting stages comes from Thomas Bardwell’s 1756 book “Anecdote of Painters”. This is the first book published in Britain giving a detailed and comprehensive set of instructions for a method of oil painting. Bardwell stated that he discovered his method by studying the art of the past.

Bardwell’s “perfect painting method” involves the following stages:

Dead Colouring
- a flat colouring applied over a preparatory drawing.
- a broad and simple manner using large brushes.
- omit details and blur edges.
- thick in lights and thin in darks.
- aim for the general effect of colour and chiaroscuro.

First Painting
- the first step is the creation of the illusion of form called “big form modeling”.
- next begin the description of the planes and details upon them.
- attention is paid to refining shapes, shades and variety of tints.
- paint is laid on without blending so the final affect is like a mosaic.
- “fat over lean” - this layer contains more oil in the medium than previous.
- lights thick, shadows thin.

Second Painting
- the finishing stage, again fat over lean.
- a thin couch of paint is used to cover the thicker first painting and each area is repainted with an attention to subtle blending
and modeling.

Glazing and Toning
- In this final stage very light layers of transparent or semi – transparent paint are applied over an area which needs to
adjusted, either darked or softened slightly.
- Titian, when asked how he completed his paintings, replied “Velatura, trenta o quaranta” (Glazes, thirty or forty).

Click twice on the painting of Simona above for a close up look at all the stages. Her left cheek is the only part second painted. The right eye is still in the drawing stage while the right check is described simply with front and side planes. The rest of the head is first painted. The campitura is the coloured ground that I started upon. Here it was Old Holland burnt umber and lead white.

Sunday, July 11, 2010

Building a Mural- Part 3

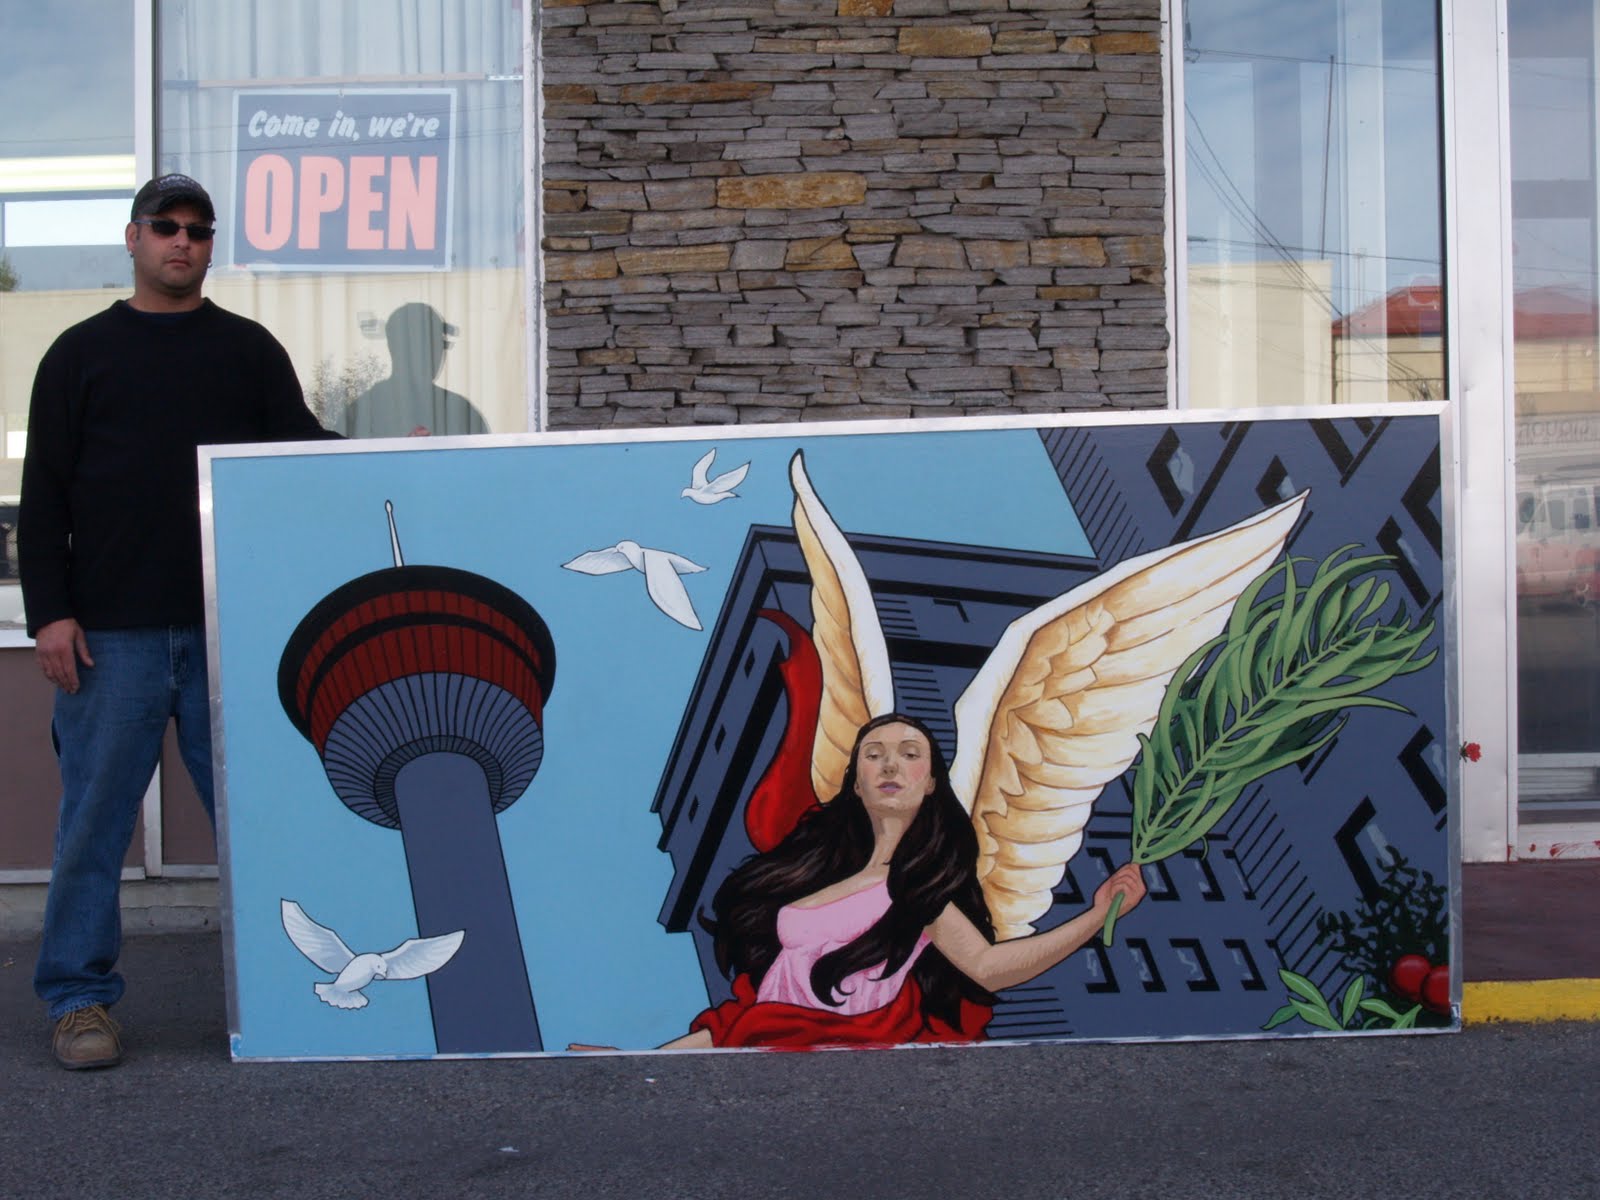
In this last post on the painting of a mural, I am going to share some pictures of the work in progress. This project was a tremendous learning process, particularly with regards to working within a budget, on a large scale and in a set time frame. During the painting stage I had 6 assistants working with me at various times.

Once the sketch was finalized, it was gridded and transfered to the panel. The panels used were plastic, reinforced with a metal frame and coated with an etching primer which provided an excellent surface to paint on.


Next is the big colour lay-in:


Since we were using acrylics and latex paint blending colours was difficult. In order to model the forms and add smaller details, we crosshatched both lighter and darker colours on top of the lay-in. Notice the addition of the head on the upper left side that was not in the original sketch. The client asked that I include my self portrait as I had done in a previous mural I had painted for them.


The panels before and during installation:


The mural, "An Allegory of Peace in Our Time", is situated along International Avenue (4015 17 Ave. S.E.) in Calgary, Alberta, Canada.

Tuesday, July 6, 2010

Annigoni and the Cadaver

Inspired by the blog entry "Cadaver on the Cross" over at Gurney Journey, I thought I would relay the story of Pietro Annigoni's use of a dead body for a crucified Christ figure in two of his works. As told by Micheal John Angel, in 1939 Annigoni was painting a number of frescoes in the Monastery of San Marco when he heard about the death of a 30 year old Sicilian in a motorino accident outside Florence. Needing a model for Christ, he asked the authorities for the body on the condition that the monks at San Marco would take care of the burial. He strung the body up in his studio where rigor mortis started to set in while he sketched away. These sketches were worked up into a cartoon that he used for this fresco:


Thirty years later, Annigoni used the same cartoon for his fresco of the Deposition and Resurrection at the church in Ponte Buggianese, a small town just outside Florence:

Saturday, June 26, 2010

Building a Mural Part 2

In the first entry of this series I went through the steps I took to come up with an image of world peace. Once the sketch was approved I began photographing models.


With photos of all the models and various reference I refined the sketch into a more interesting drawing.


This sketch was scanned into the computer and using photoshop a number of colour studies were tried:

Double complimentary (orange with blue and red with green) colour scheme:


Triad (red, yellow, blue) with light background:


Triad (red, yellow, blue) with a near complimentary counterpoint (green-orange) and dark background:


This last version is the one that we choose to use. In the next entry I will show the painting and installation of the mural.