Monday, July 26, 2010

The Perfect Painting Method


The terminology I use in describing the painting stages comes from Thomas Bardwell’s 1756 book “Anecdote of Painters”. This is the first book published in Britain giving a detailed and comprehensive set of instructions for a method of oil painting. Bardwell stated that he discovered his method by studying the art of the past.

Bardwell’s “perfect painting method” involves the following stages:

Dead Colouring
- a flat colouring applied over a preparatory drawing.
- a broad and simple manner using large brushes.
- omit details and blur edges.
- thick in lights and thin in darks.
- aim for the general effect of colour and chiaroscuro.

First Painting
- the first step is the creation of the illusion of form called “big form modeling”.
- next begin the description of the planes and details upon them.
- attention is paid to refining shapes, shades and variety of tints.
- paint is laid on without blending so the final affect is like a mosaic.
- “fat over lean” - this layer contains more oil in the medium than previous.
- lights thick, shadows thin.

Second Painting
- the finishing stage, again fat over lean.
- a thin couch of paint is used to cover the thicker first painting and each area is repainted with an attention to subtle blending
and modeling.

Glazing and Toning
- In this final stage very light layers of transparent or semi – transparent paint are applied over an area which needs to
adjusted, either darked or softened slightly.
- Titian, when asked how he completed his paintings, replied “Velatura, trenta o quaranta” (Glazes, thirty or forty).

Click twice on the painting of Simona above for a close up look at all the stages. Her left cheek is the only part second painted. The right eye is still in the drawing stage while the right check is described simply with front and side planes. The rest of the head is first painted. The campitura is the coloured ground that I started upon. Here it was Old Holland burnt umber and lead white.

Sunday, July 11, 2010

Building a Mural- Part 3

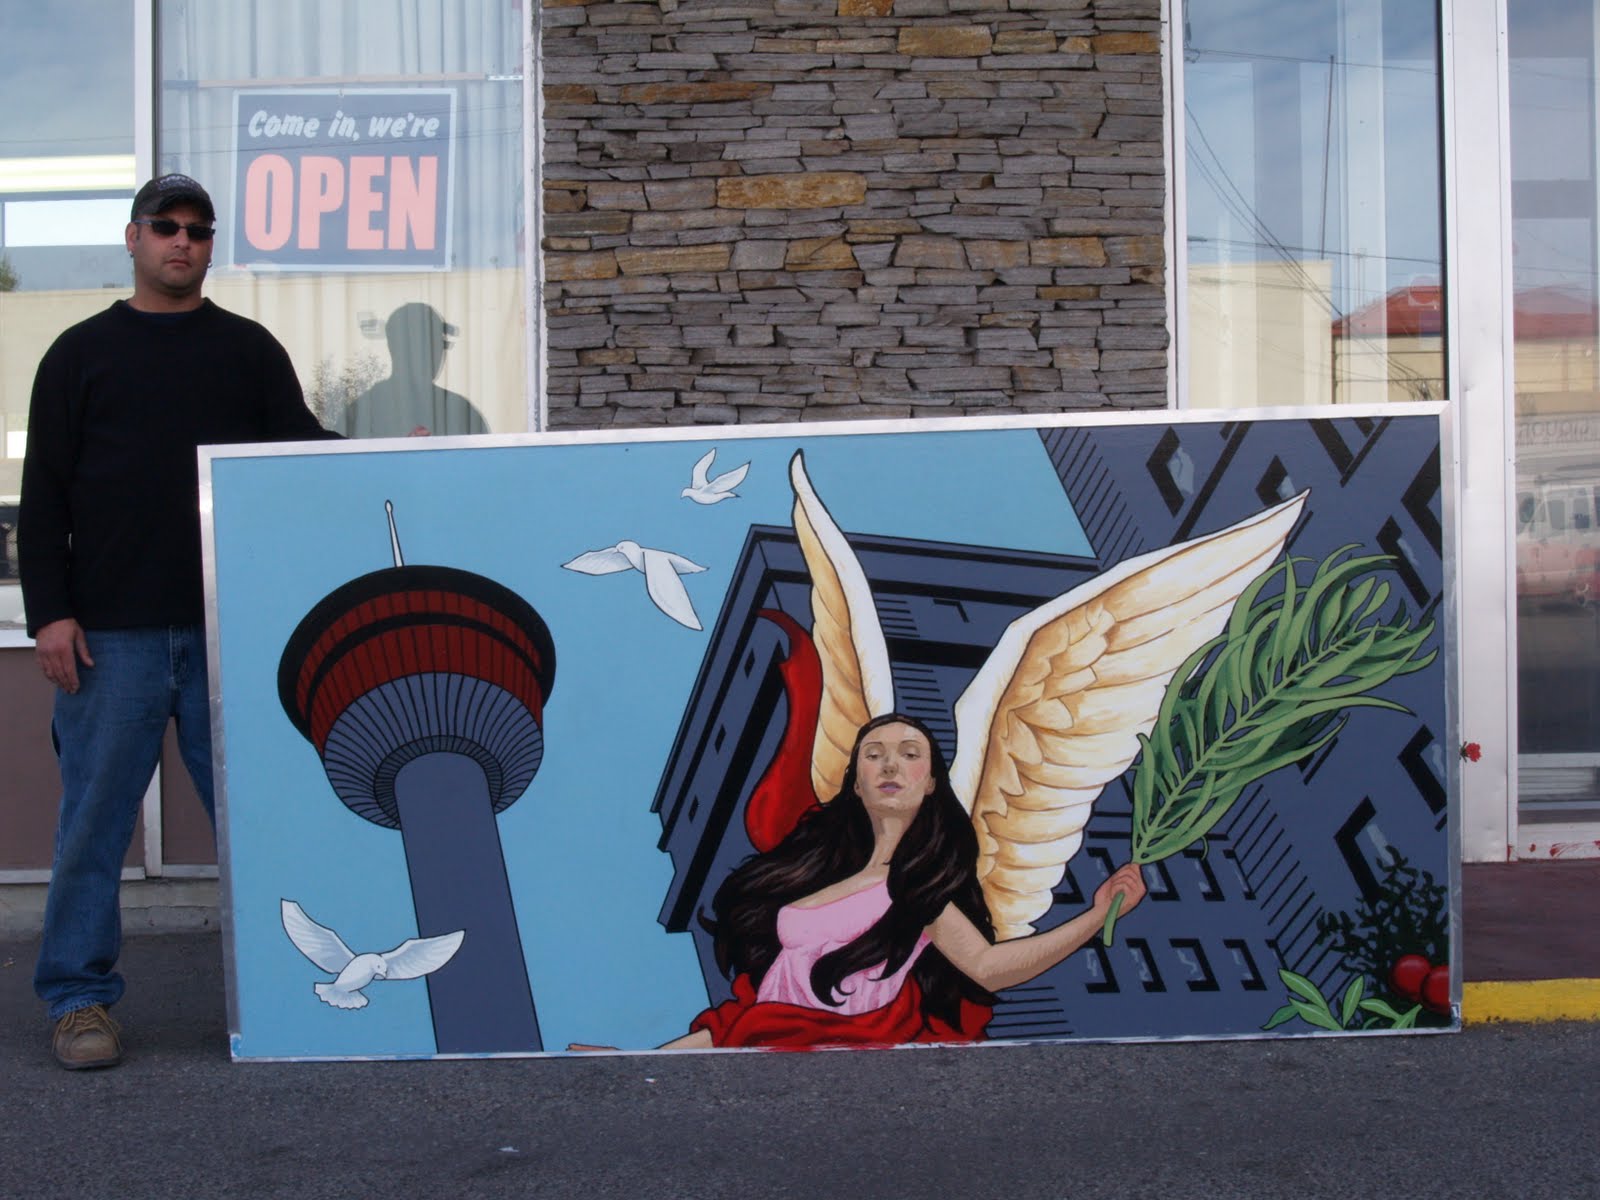
In this last post on the painting of a mural, I am going to share some pictures of the work in progress. This project was a tremendous learning process, particularly with regards to working within a budget, on a large scale and in a set time frame. During the painting stage I had 6 assistants working with me at various times.

Once the sketch was finalized, it was gridded and transfered to the panel. The panels used were plastic, reinforced with a metal frame and coated with an etching primer which provided an excellent surface to paint on.


Next is the big colour lay-in:


Since we were using acrylics and latex paint blending colours was difficult. In order to model the forms and add smaller details, we crosshatched both lighter and darker colours on top of the lay-in. Notice the addition of the head on the upper left side that was not in the original sketch. The client asked that I include my self portrait as I had done in a previous mural I had painted for them.


The panels before and during installation:


The mural, "An Allegory of Peace in Our Time", is situated along International Avenue (4015 17 Ave. S.E.) in Calgary, Alberta, Canada.

Tuesday, July 6, 2010

Annigoni and the Cadaver

Inspired by the blog entry "Cadaver on the Cross" over at Gurney Journey, I thought I would relay the story of Pietro Annigoni's use of a dead body for a crucified Christ figure in two of his works. As told by Micheal John Angel, in 1939 Annigoni was painting a number of frescoes in the Monastery of San Marco when he heard about the death of a 30 year old Sicilian in a motorino accident outside Florence. Needing a model for Christ, he asked the authorities for the body on the condition that the monks at San Marco would take care of the burial. He strung the body up in his studio where rigor mortis started to set in while he sketched away. These sketches were worked up into a cartoon that he used for this fresco:


Thirty years later, Annigoni used the same cartoon for his fresco of the Deposition and Resurrection at the church in Ponte Buggianese, a small town just outside Florence:

Saturday, June 26, 2010

Building a Mural Part 2

In the first entry of this series I went through the steps I took to come up with an image of world peace. Once the sketch was approved I began photographing models.


With photos of all the models and various reference I refined the sketch into a more interesting drawing.


This sketch was scanned into the computer and using photoshop a number of colour studies were tried:

Double complimentary (orange with blue and red with green) colour scheme:


Triad (red, yellow, blue) with light background:


Triad (red, yellow, blue) with a near complimentary counterpoint (green-orange) and dark background:


This last version is the one that we choose to use. In the next entry I will show the painting and installation of the mural.

Thursday, June 24, 2010

Beauty Part 1


The great artists of the past were aware that human life was full of chaos and suffering, but they had a remedy for this and the name of that remedy was Beauty. - Roger Scruton
http://www.youtube.com/watch?v=65YpzZrwKI

Sunday, June 20, 2010

Building a Mural - Part 1

The last couple of entries have been about drawing figures without a model and then putting those figures into a convincing space. I would like to share know how an artist (me) uses that knowledge to develop a picture from idea to concept sketch and on to finished painting.

Last year I was commissioned by a community in Calgary to paint a mural on the theme of world peace. My idea was to place the traditional figure of Peace - a winged woman with a palm branch- into a modern setting. Here are the steps I went through to get an approved sketch.

The first step is to just draw small quick sketches. Things start off slow but soon the pencil flows a little easier.


From the initial sketches I picked a couple and developed them into a slightly more finished sketch.


The client liked the idea of the peace figure coming down to meet the people. I developed the composition and added a range of ethnicities:


This is the final step in the development of the image. In the next entry I will show how I moved from this sketch to final colour study and readiness to paint.

Wednesday, June 2, 2010

Figures in Space 2

After one has spent a considerable amount of time practicing drawing the figure without a model (the old saying goes we all have 10 000 bad drawings in us which we have to get out), the next step is to place those figures in a convincing space.
The following images are taken from Andrew Loomis' book "Figure Drawing For All It's Worth" (http://fineart.sk/index.php?cat=1or www.alexhays.com/loomis/). They are an excellent demonstration on how to put the figure into a drawn perspective space.


Leonardo da Vinci using one point perspective:


Examples of other artists placing figures in perspective:

Andrea Del Sarto


Alma-Tadema


Gerome


Byrne


Gurney


Repin